Data Recovery Tips
- Data Recovery Tips+
-
- Best Hard Disk Bad Sector Removal Software
- Recover Overwritten Files on Windows/Mac
- Fix the Error "Windows has recovered from an unexpected shutdown"
- Recover Recycle Bin on Windows 10/8/7/XP
- Recover 0 Byte Files in Windows 10/8/7
- Recover Snapchat Email Address and Password
- Top 3 Data Recovery Hardware
- Top 7 Linux Data Recovery Software
- Recover Deleted Files from Network Drive
- Recover Files from My Passport External Hard Drive
- Top 5 Windows Password Recovery Tools
- Hard Drive Password Recovery and Data Recovery

• Filed to: Data Recovery • Proven solutions
Although the network attached storage (NAS) are considered to be very reliable storage solution for homeowners and business owners alike, they are highly exposed to failure and outage, and when they do, it literally becomes impossible to access the data stored in them. The failure will basically differ depending on the implementation type, but basically, the device will fail as a result of the system crash or malfunction, power surge, security failure, control board failure or just simple human errors. And it is also hard to do NAS data recovery, we will discuss this issue in this article.
Part 1. What is NAS Data Recovery
NAS devices normally restrict access to the storage drives except for the one iSCSI protocols. These devices are more complex than the typical USB disk enclosures, and they usually do not function in the same manner. Therefore it becomes quite difficult to recover data if something does happen to them. The NAS data recovery is a process that will rescues and handle the data from a failed device, and move it to a safe and accessible location. While NAS can significantly increase the available data, the limitation of the hardware can make data recovery extremely difficult. But this doesn't mean it's impossible.
Part 2. How to Perform NAS Data Recovery
If your NAS Device has failed, then you will need to follow these steps:
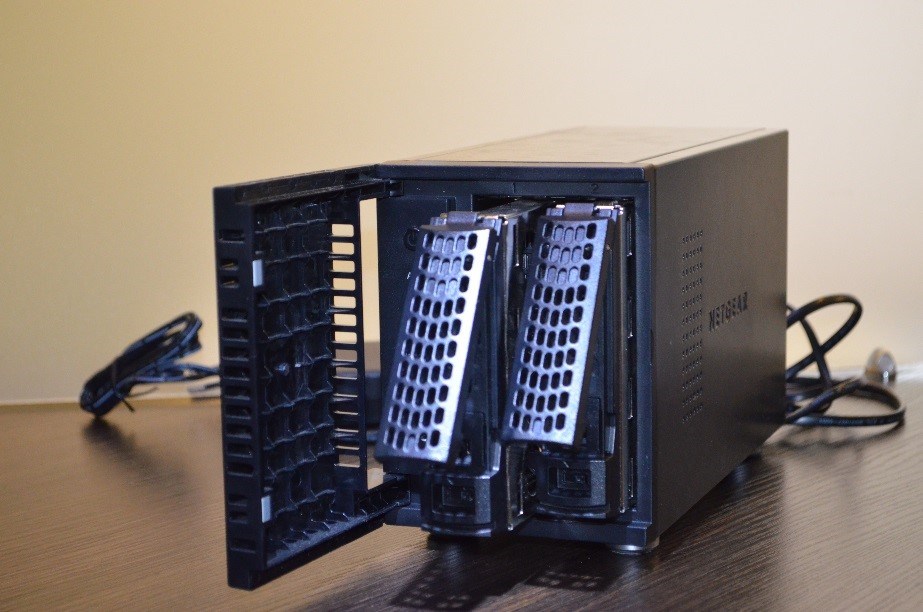
Step 1. Get all the NAS disk out of the device.
This might seem too obvious, but it's not. You will probably need to have a look at some of the video tutorial available to correctly get these disks out of NAS.
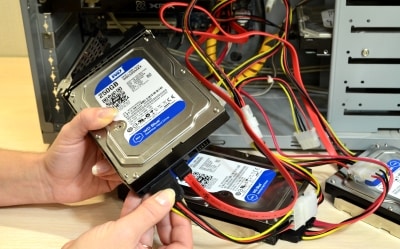
Step 2. After getting all the disk, connect them to the recovery PC.
Any computer running Windows can be used. You can use the USB port, but SATA is a bit preferable unless your PC doesn't have enough ports for connection. For speed purposes, it would be better if you connect the disks to the motherboard.
Step 3. Pre-prepare the disk space.
You need to prepare the space you are going to recover your data's too, but remember the storage space has to be equal to that on your NAS. Do not expect to get the data so quickly, since the analysis of the array will require read on all the devices. This can typically take even days, for the recovery to complete. Once you have made all the above preparation, you can use third-party NAS recovery software. Most of the software you will come across has some form of recovery capabilities; however, you need to be a little bit keen as many of them can overwrite the data you intend to recover.
Part 3. The Best NAS Data Recovery Software for Mac and Windows
Recoverit Nas Data Recovery is one of the best NAS data recovery software you will come across, whether it's the oldest or the newest NAS (Network Attached Storage) configuration on the market; it's entirely different from the pack. It's a life saver when it comes to solving your data loss problems; you get your lost data safely, quickly and comprehensively. The software is compatible with Mac, and will typically recover everything from emails, images, music, to videos, to archive files. To simply put it, the software deeply scans the through the system and recovers everything you need. This software also provides an easy and professional dara recovery survice for anyone who needs NAS data recovery.
Recoverit Data Recovery
Why Choose This NAS Data Recovery Software:
- Recover lost data from Nas drives in various scenarious: such as hard drive formatting, data inaccessible, RAID restruction failure, power failure, tec.
- Recover all files types and support 1000+ file formats: videos, photos, emails, documents, etc.
- Supported various NAS brands (Synology, QNAP, ASUSTOR, WD, etc.) and all RAID types (RAID 0, RAID 1, RAID 5, RAID 6, and RAID 10).
- Provide a nice NAS data recovery exprience and a very high recovery success rate.
- Before recovery, you can preview the images, song, videos and archived files.
Step-by-Step Guide for NAS Data Recovery
Step 1. Install the NAS Data Recovery Software.
You will need to download the Recoverit on your computer or Mac, this process should not take more than two minutes, select NAS Recovery under the NAS and Linux Recover tab, then click the "NAS Recovery" button.
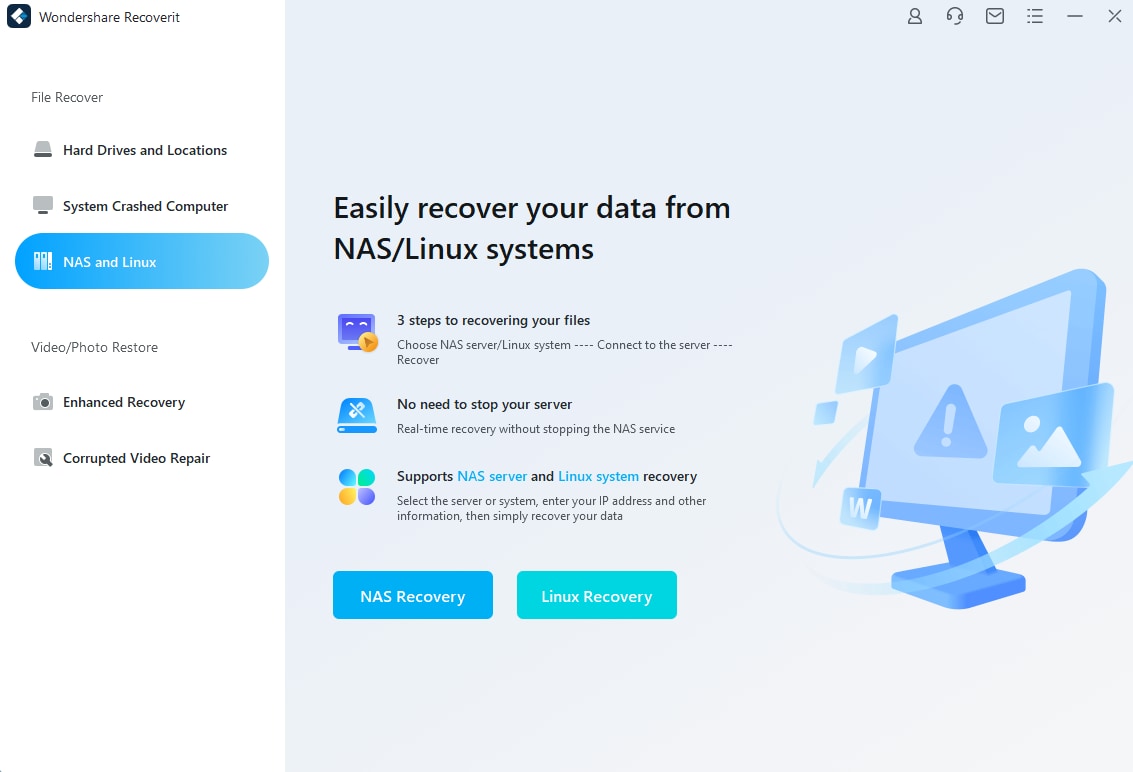
Step 2. Connect your Nas device.
Please connect your NAS device to the computer or Mac, when Recoverit completes the scanning process, you will see NAS detectable devices under “NAS Servers” on your screen, as shown below.
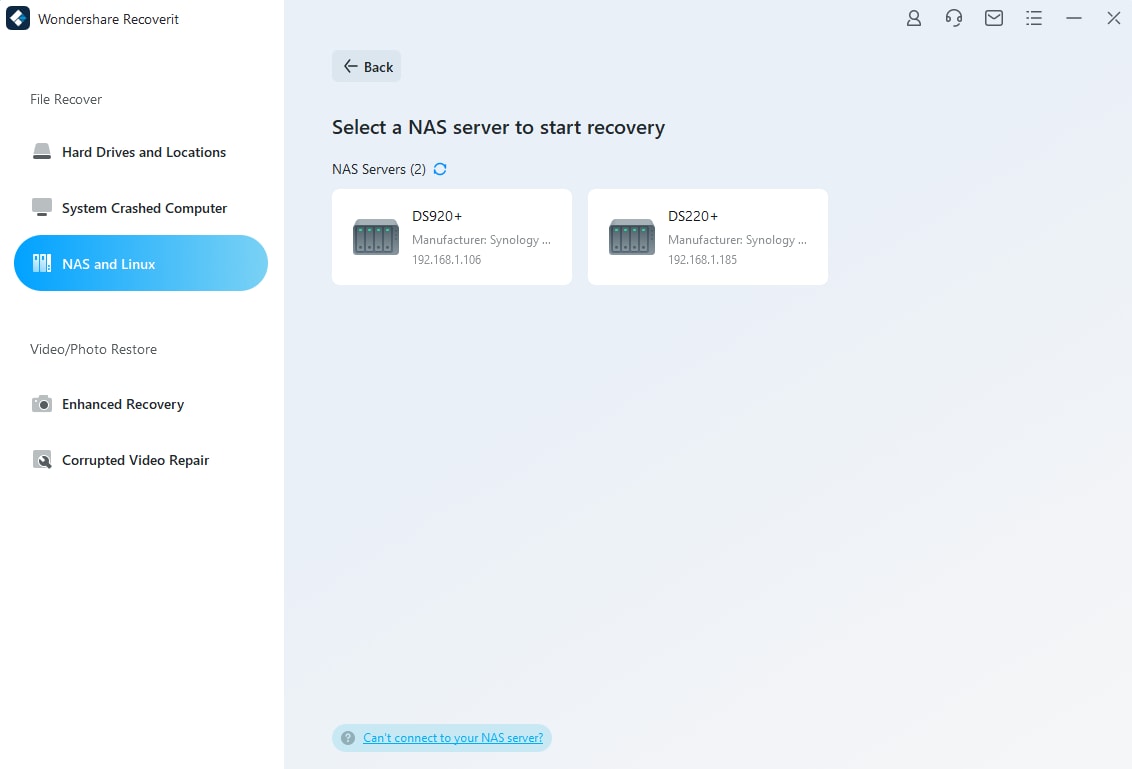
Step 3. Start the recovery process.
Choose the Nas server where your data lost and click on it to move forward, then type the necessary information and click the "Connect" button.
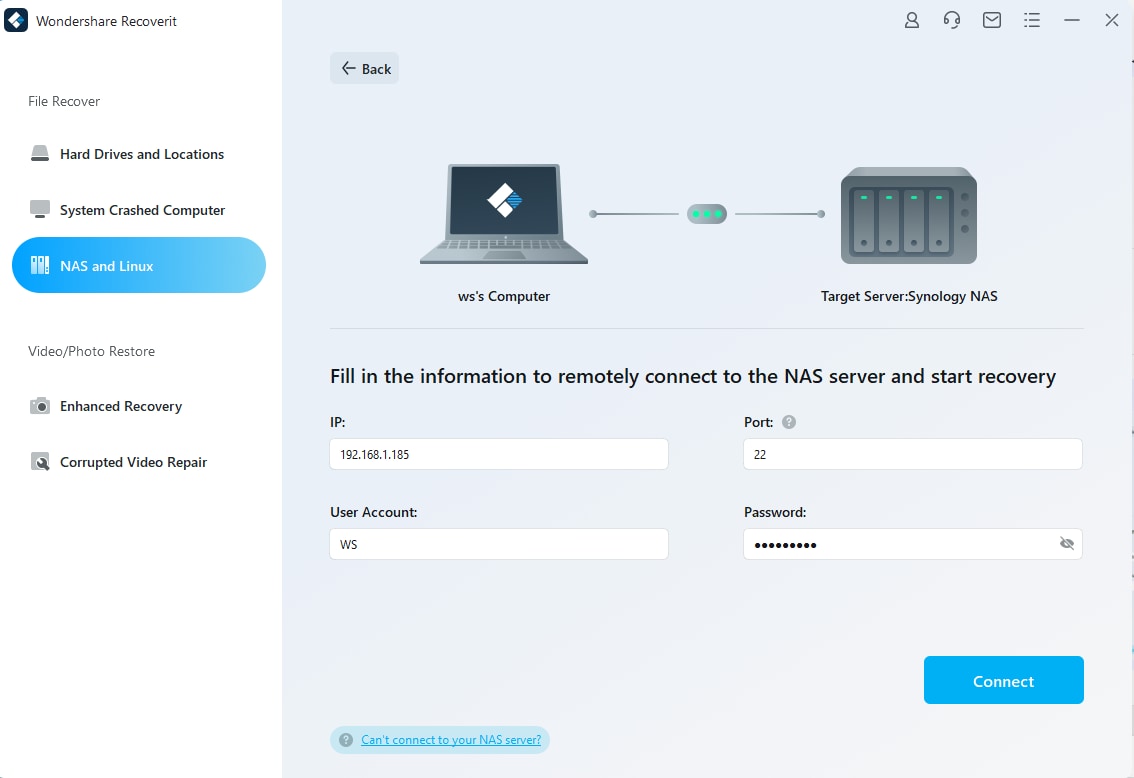
Recovery will start scanning the Nas drive to find lost data it it, just wait for a moment.
Step 4. Recover and save the files.
After the scanning process finishes, you can preview the recovered files by clicking the "Preview" button, then click "Recover" to save them on your computer or Mac.

Elva
staff Editor