Mac OS X 10.11 El Capitan has been released as a new Mac operating system. With the entire buzz you may decide to upgrade to from Mac OS X 10.10 Yosemite to El Capitan. After sometime you will realize that it is not what exactly what you wanted hence you will need to downgrade to Yosemite. To some extend you may find out it does not work with your computer or it crashed when you installed it. Without doubt you will opt to revert to Yosemite. Downgrading from El Capitan to Yosemite is possible but you will lose your content if you do not do a backup. But don't worry. If you are encountering this situation, you can follow this guide to recover lost data from Mac OS X 10.11 El Capitan after downgrading.
Part 1. Best Data Recovery Software for Mac OS X El Capitan

However if you lose your data due to operating system downgrade on your Mac you can still fix that out. What you need is absolute software like iSkysoft Data Recovery. This software is well built with four recovery modes that can recover documents, images, videos, emails, music and archives from various devices such as Mac computers, player, USB, hard drives, digital camera, memory cards and USB drives.
Whether virus, damaged, attacks these devices broken, formatted this application can still retrieve data from them. Moreover this software has a simple user interface that allows you to restore data alone without hiring an expert. This software supports Mac OS x 10.6, 10.7, 10.8, 10.9, 10.10, 10.11 El Capitan and latest macOS 10.12 Sierra.
Part 2. How to Recover Files after Downgrading to Yosemite from Mac OS X El Capitan
What You Will Need:
A Computer;
Recoverit (IS) for Mac
Time Required:
Time will vary according to file's size
Difficulty:
Easy
Step 1: After installing Recoverit (IS) on your computer, open it. From there you will see the data types such as photo, video, audio, and more. You can just choose the one you want to recover. You can also select the "All File Types" to let the program recover all of the data for you.

Step 2: On the new window you will have to mark the path (drive) where you lost your data. Then simply hit "Start" button. The program will start scanning the missing files for you. Now you can go for a cup of coffee and the software will take care of the rest.

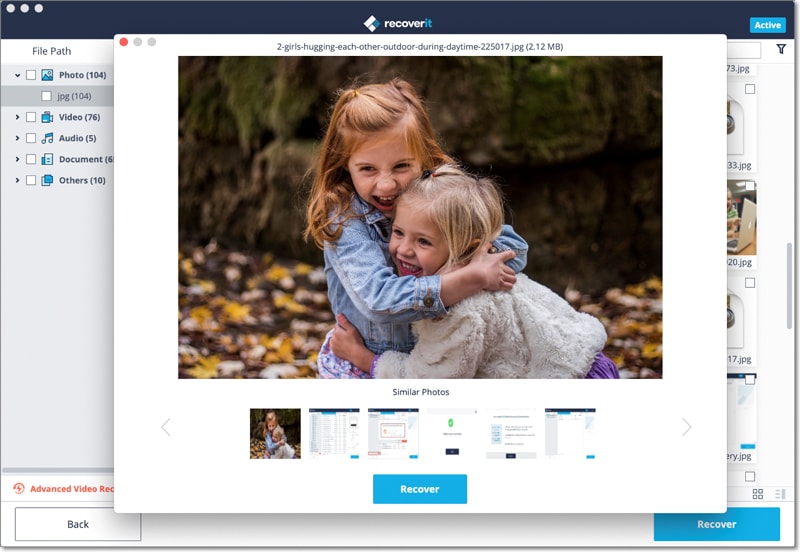
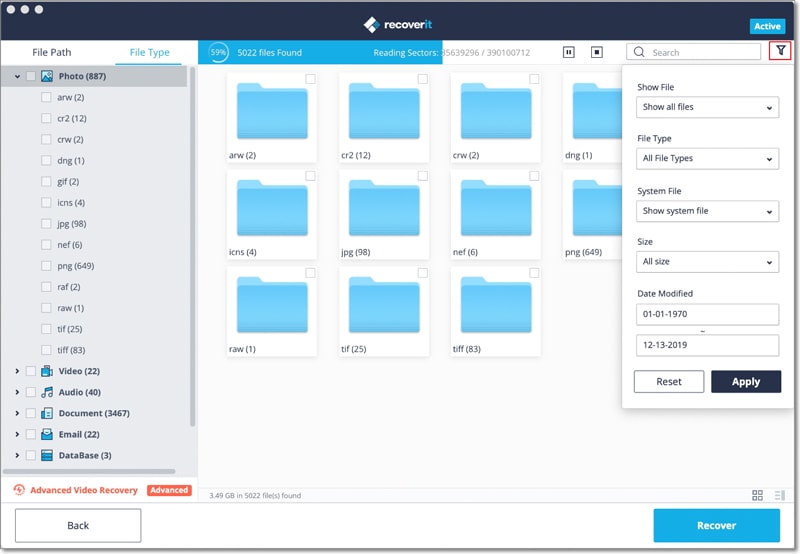
Step 3: When scanning complete, use the "Search" and "Filter" features to find your lost files quickly. Find your wanted files and preview them. To recover a file, check the box before it and click the "Recover" button on top. In the window that opens, choose a folder you want to save the file to and click "OK" to start file recovery. Done!
Optional: There is an option "Deep Scan" locating on the bottom, which give you chance to have a deeper scan on your Mac to discover and recover more files for you.