


It can be quite distressing losing all of the work you have been diligently laboring on for hours due to a power blackout or a simple unplugged cable. Despite the fact that power outages maybe the greatest culprit when it comes to this kind of data loss mishaps, you can lose all of the data on your Word document due to a whole host of other unrelated reasons. Your Mac or Windows can suddenly encounter a problem that results in data loss. Fortunately for you, Microsoft has several solutions to recover word document on Windows. You can use either one of these solutions or a combination of them all to get your Microsoft word document back and continue working on it. In this article we are going to address some of these solutions, providing you with a step by step guide on how to use each one of them.
Part 1: A Full Guide to Recover Word Document on Windows
The following are just some of the ways you can get your Microsoft Word Document back. Most of them are easy to implement and work very well. Let's get started.
1. Close All Word Windows and Restart Word
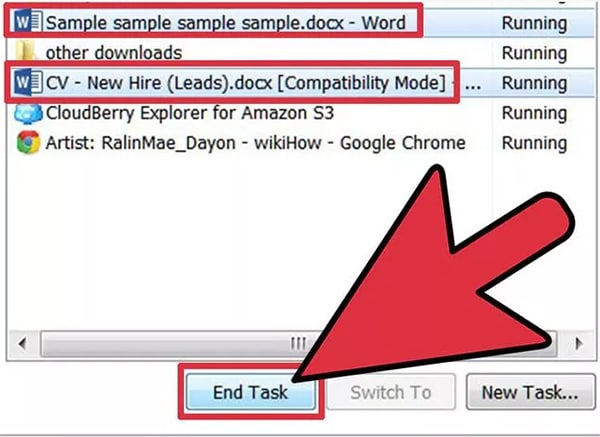
The first thing you should do is try restarting Word. This often works very well to do word recovery. But to be sure that you have closed all Word Windows, use the Task Manager. Once all of the Word Windows have been closed, restart Word and on the left side you will be able to see all of the recoverable files (the ones that were lost without being saved.) If the file you are missing is available on the list, open it and then save it.
2. Check the Recycle Bin
Of course this may only work if you at some point deleted the file or if you think you may have accidentally deleted the file. If you find it in the recycle bin, restore the file by right-clicking on it and then choosing "Restore". The file will be restored to its original folder and you can then just open it and continue editing. But be sure to save it in a different location.

3. Searching for It in Windows
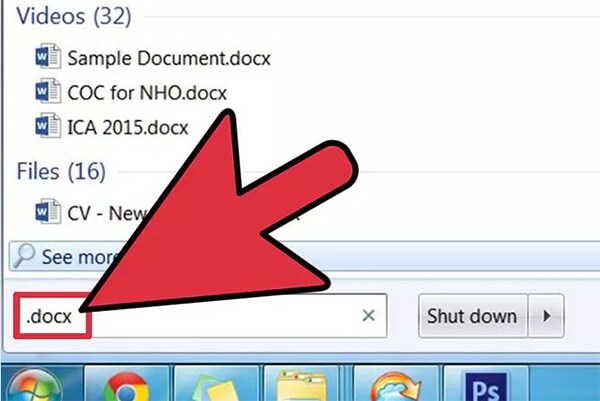
If none of the above work and you are still unable to find your document, you can try searching for it in Windows. To do this, click on the Start Menu and then enter the document name in the Search Field. If you are using Windows 10, click on the search icon (magnifying glass) next to the Start Menu. Start typing the name of the file in the search box provided and Windows will provide you with closely matching solutions. To make it easier to find the document, you can specify that you are looking for Word documents in particular by entering .doc or .docx in the search bar.
4. Look for the Document in the Backup Files
If you had enabled Backups in Microsoft Word, you might be able to find a backup file of the document you have lost. To do this launch Word and then click "File". Select "Open" and in the "File Types" menu select "All Files". You can then navigate to the folder where the document is saved and select the backup file to open. You can also just search for the backup file like we did above, except this time, you add ". wbk" into Windows Search.
5. Search Manually for Auto Recover Files
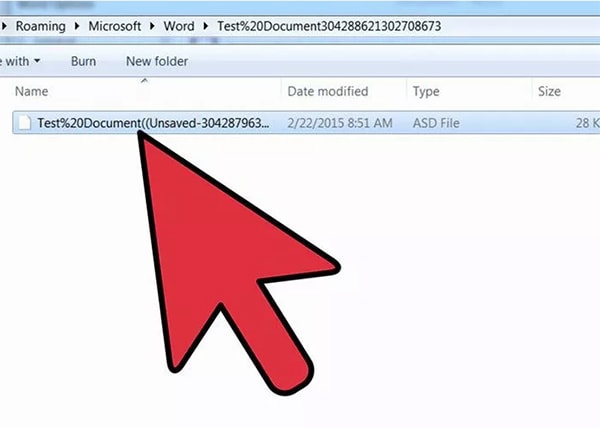
Whenever you restart Word, there are always auto recover files in the left pane. If there aren't there, you can manually search for them. To do this click on "File" and then select "Recent". At the bottom of the menu window select "Recover unsaved documents" and then browse for the file you want to recover. This works with Word 2010 and above. If you are using earlier versions of Windows, try searching Windows like we did in number 3 above but this time search for .asd files.
6. Search for Temporary Files
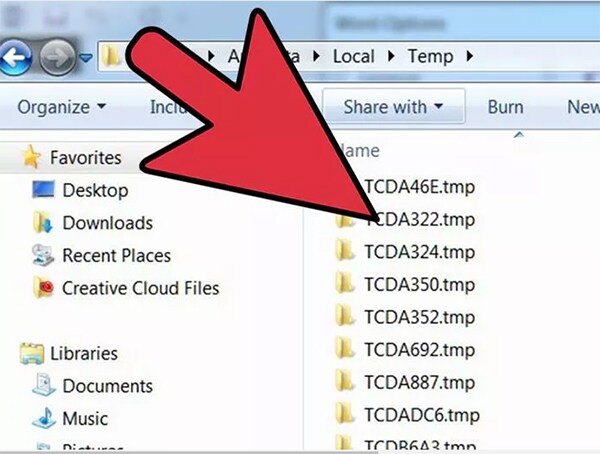
If all of the above fail to work, you may be able to find your file in the Temporary files folder. This is where files such as downloads that weren't saved, program files that accumulate when updates are downloaded and many other temporary files are located. You can access it through Windows Explorer or by searching for the temporary files in in Windows Search. Just like we did in number 3 above, click on the Start Menu and then enter the filename of the lost document in the search box. But in order to find temporary files you need to add the extension .tmp.
Browse through the results to find the document you are looking for. It will have the same filename you used when saving it. it is also important to note that temporary files may contain the (~) symbol so entering that symbol may help you find the document faster. When you find a temporary Word document, you may need to repair it to have any chance of editing it. It is also a good idea to save it in a different location to avoid losing the document again.
Part 2: The Safest Method to Recover Word Document on Windows
So what if you do all of the above and nothing works? You may be forgiven to think that you have completely lost your document. But there are other measures that you can take that can allow you to get all of the data on your device. One of the most viable solutions is to use Data Recovery software. While many of them are available, not all of them are as effective and more still are unsafe and may cause data loss or damage to some of the drives on your computer. But this doesn't mean that all of them are bad. To help you get your Word document back we have found the best and safest Data Recovery software you can use to recover your lost document. iSkysoft Data Recovery for Windows provides you with several features that make data recovery easy, quick and completely efficient.
Key Features of Recoverit (IS):
- Despite its high capability, the software still comes with an easy to use interface that makes it one of the best programs even for beginners.
- All data will also be recovered in the same condition as the original. With documents, this means that you can get your Word document back with all of its formatting intact.
- None of the other data on your computer will be at risk. The program utilizes a read-only process so nothing on your drive will change, only the missing file will be recovered
Step-by-Step Guide to Recover Word Document on Windows
Before we begin, download and install the program to your computer. But be sure to install the application on a different drive other than the one with the missing Word document. This will prevent the overwriting of any data on your device and hence maximize the chances of recovering the document intact.
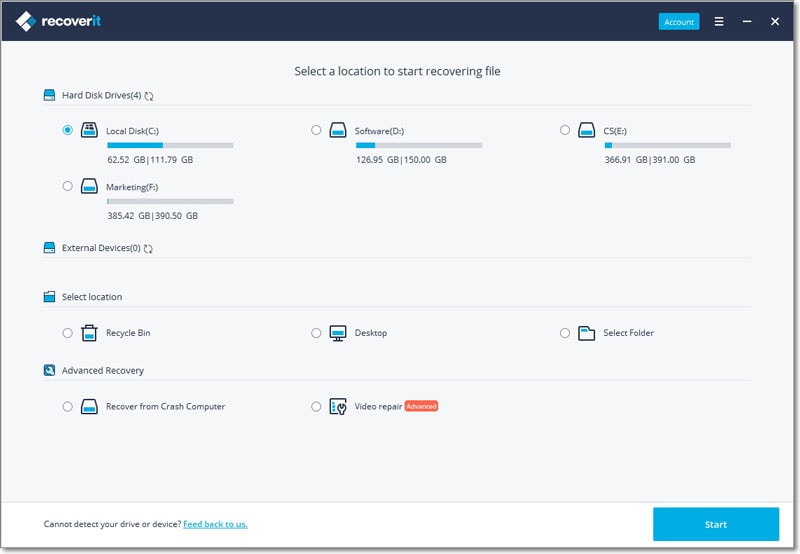
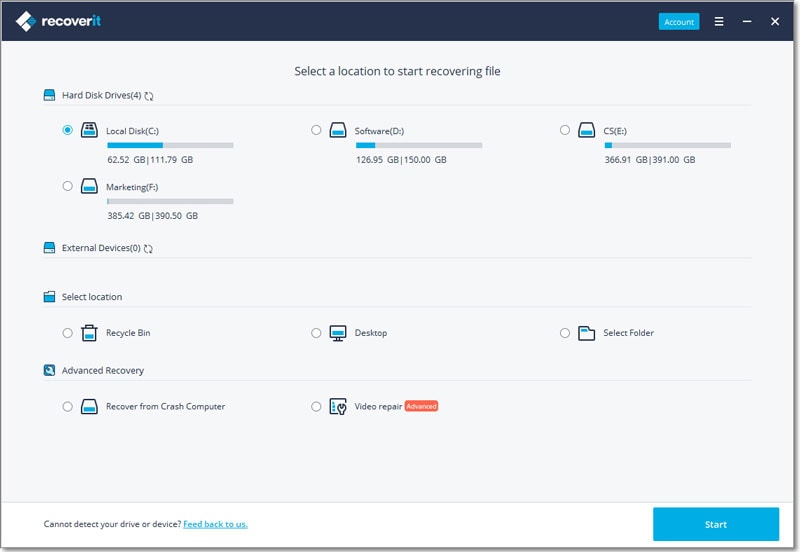
Step 1. Launch the program on your computer and you should see the following primary window displaying all of the file types that you can recover with this program. Choose the types that you want to recover and hit "Next".
The partitions on your computer will be displayed in the next window. Select one of the partitions and then click "Start" to begin scanning the selected partition.
Step 3. Once the scan is complete. You should be able to see all of the files that are available on that drive. All you have to do is select the data you want to recover (in this case, your missing word document) and then click on "Recover".

If you don't find your wanted document, you are suggested to go for the "Deep Scan" mode. It may take longer than before but this is taking an in-depth look at all of the data on your drive.
To avoid losing the document again, it is very important that you save the document on a different drive. As a matter of fact, maximum safety may be assured by saving the document on an external storage device.
As you can see, Recoverit (IS) for Windows offers a great solution for you to quickly and easily recovery your missing Word document. because it can be used to recover a lot of other different file types, it is a great and handy program to have around. At the very least, it will save you a lot of time and frustration when trying to find your missing document. It is our hope that you are able to find your Word document and that everything is back to normal.


