


How do I connect my DSLR to Facebook live?
Can you use a DSLR to live stream?
DSLR is the short form for Digital Single Lens Reflex. DSLR cameras are the most popular and standard choice by photographers as they offer pro photos with high quality. They are versatile and their lens can be interchanged depending on the type of pictures one wishes to capture.
Live streaming is a bridge that connects content creators with the online audience. Using a DSLR for streaming is like building a strong bridge. A DSLR cam offers excellent video quality and amazing low light performance which can make the livestreaming video more appealing and likable to the audience. It will retain a standard quality even in surroundings not suitable for a video shoot.
In this article we are will be explaining how to use a DSLR camera for live streaming on different social media platforms and using different third-party applications.
Tips: In addition to the DSLR cameras, you can also use other types of cameras to go live, like 4K camera or 360 camera.
Now, let's get started.
- Part 1. How to Live Stream to Facebook Live Using a DSLR Camera
- Part 2. [3 Solutions] Live Stream DSLR to Facebook/YouTube by Streaming Software
How to Live Stream to Facebook Live Using a DSLR Camera
Facebook is a platform where most of us stream videos and have a huge audience for it. The quality of the video is the most important factor in making the Facebook audience watch the video and like it. So let us find out how to live stream on Facebook using a DSLR camera to achieve the best quality.
There are some additional factors that affect the quality of the video other than the DSLR camera. The speed of your internet connection, your storage space, the use of HDMI or SDI ports, etc., all are very important.
Let’s find out how to use an HDMI or SDI cord to connect the camera and computer to live stream on Facebook
Step 1: Connect the DSLR camera to a signal converter using an HDMI or SDI cord.
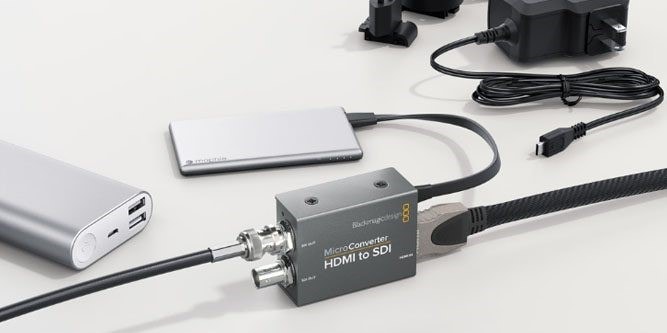
Note: In order to achieve the quality of 1080p or 4K footage from the DSLR camera to your PC, you will have to use a converter that converts your HDMI video content into a USB friendly file in real-time. An HDMI capture card or an HDMI-to-USB converter can be used for this.
High-end cameras usually have SDI inputs, which also have the same option to use a converter.
Step 2. Confirm that signal is being passed from your DSLR to your PC. And then, open the live streaming software.
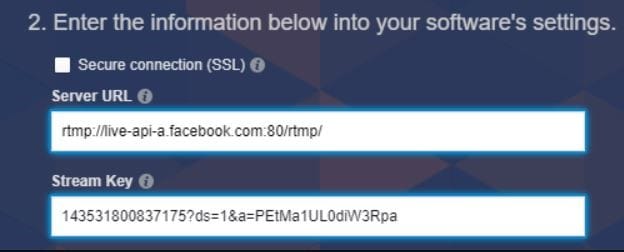
Step 3. Open the Facebook application and look for the Stream Key and Server URL which needs to be added to the livestreaming software you are using.
Step 4. Confirm the actions and start your live streaming.
Live Stream DSLR to Facebook/YouTube by Streaming Software
Live streaming a video using a DSLR to social media platforms like Facebook and YouTube required third party software encoders. Care must be taken while choosing a third-party app as there are a lot of applications in the market and you don’t want to use an application that risks your privacy and reduces the quality of the video.
Applications like OBS, XSplit, and Wirecast are very popular among online streamers and produce the best output. How about a detailed look into all three?
You may also want to know which hardware encoders for livestreaming on YouTube are available in the market.
Solution 1: How to Use a DSLR for Facebook Live with OBS
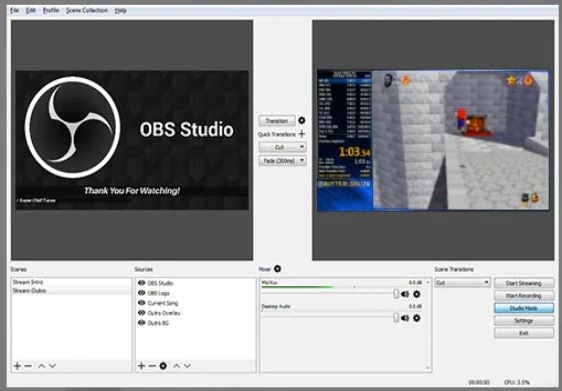
Open Broadcaster Software otherwise known as OBS is one of the top choices for live streaming to Facebook. It is currently compatible only with Windows OS and the facility of screen switching. The software also offers a wide range of editing options that are suitable for creating a customized video.
Step 1: Download and install the OBS application. And then, after open Facebook, click on the +Live tab and a popup window will appear. Copy the Stream Key at the bottom of the window.
Step 2: Now open the OBS application and tap on the Settings tab at the bottom right.
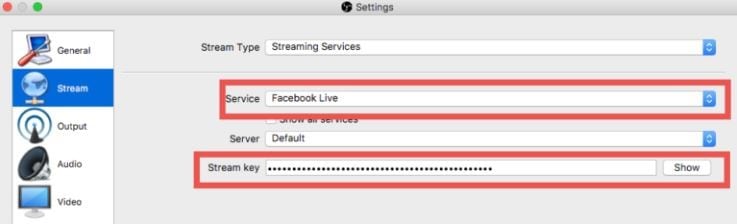
Step 3: In the window that appears, select Stream and then in Services choose Facebook Live. Paste the stream key you have copied into the Stream key column in OBS and tap on OK.
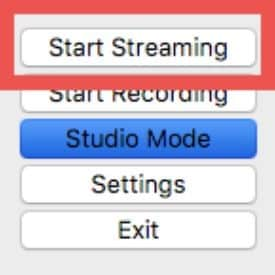
Step 4: Set up the stream on OBS. Make sure that you have connected your DSLR camera to the PC via an HDMI SDI chord. Add the video source which is the DSLR camera. Click on Start Streaming.
Step 5: Return to Facebook Live window and check the preview. If you are satisfied with the preview click on Go Live and the live-streaming will be initiated.
Solution 2: Live Stream DSLR to Facebook/YouTube Using XSplit
XSplit is an application that can handle huge data easily, which is what makes it dear to professional live streamers. This tool offers a lot of advanced features and helps in digital training courses, streaming productions, and video podcasts. Let’s dig deeper into the role of XSplit to live stream to Facebook or YouTube using a DSLR.
Step 1: Download and install the XSplit software. After open XSplit, login to Facebook using your email id and password.
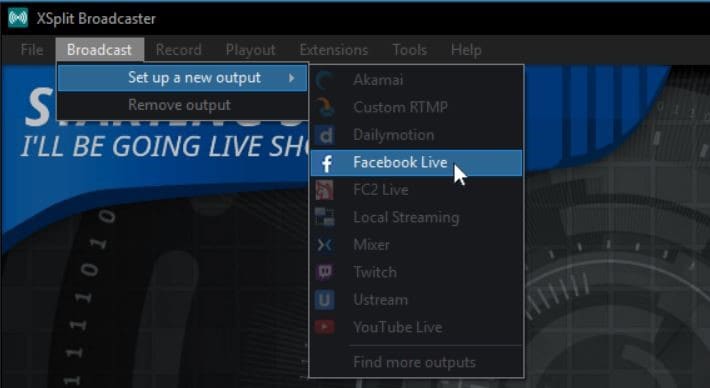
Step 2: Next step is setting up Facebook:
• Tap on Broadcast and then on Facebook Output.
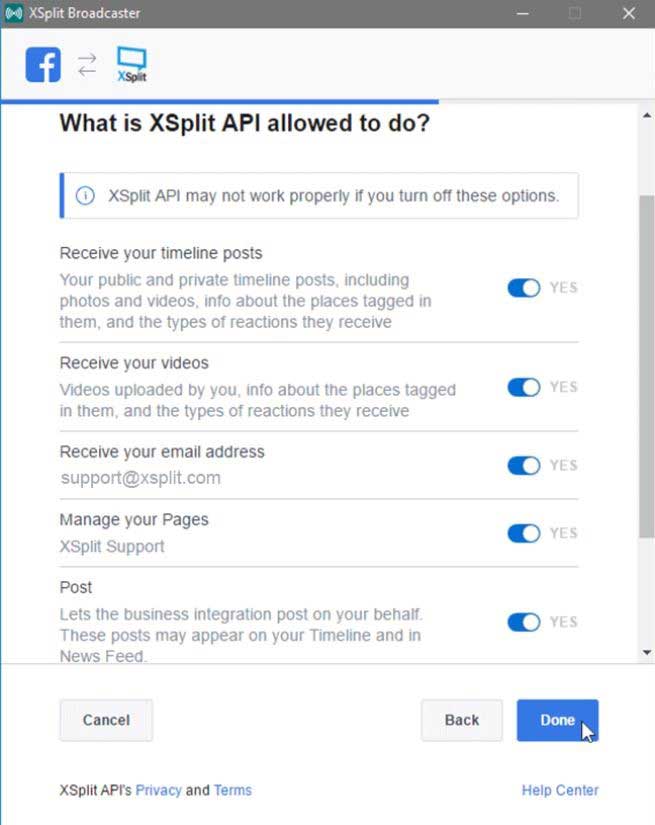
• A new window will appear in which you will have to click on Authorize and log in with Facebook again.
• Grant all the posting permissions to XSplit and under the Post On tab select the account or page you wish to stream your video on.
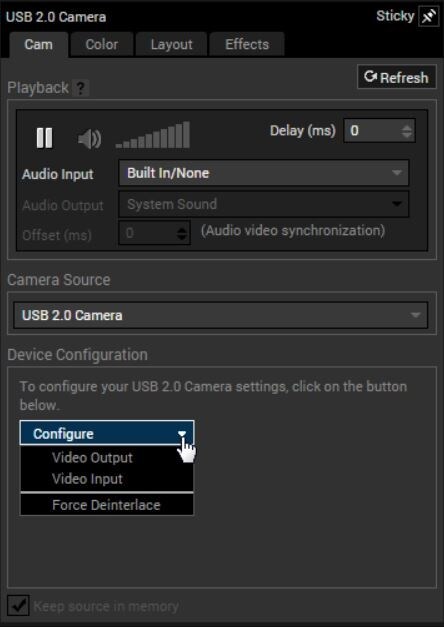
Step 3: Create a scene wherein you add the camera, effects, and other overlays. Make sure that the DSLR camera is connected to your PC. Tap on Add Source – Webcam, capture card, video devices and then select your DSLR camera from under Cam.
Step 4: Go to Services and tap on Facebook Live. Make sure that the Stream Key and Server URL are copied from Facebook to XSplit.
Step 5: Go to Creator Portal, add a description and tap on Go Live.
Do you know the difference between OBS and XSplit? Click here to learn more about the difference and comparison between OBS and XSplit.
Solution 3: How to Live Stream with a DSLR Using Wirecast
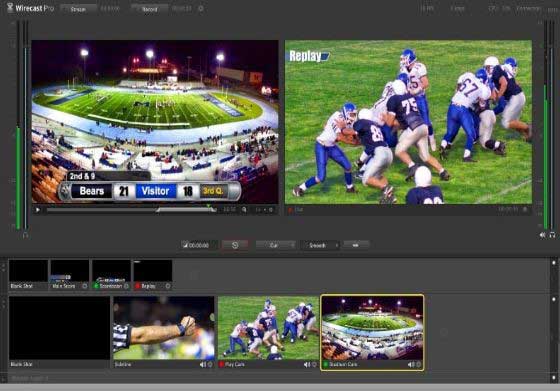
Wirecast is the most suitable application for people who wish to develop content with a touch of classic professional settings. It has a lot of features, offers smooth transitions, and has an intuitive feature set. Also, it is compatible with both Windows and Mac. Let’s see how Wirecast can be used to live stream on Facebook.
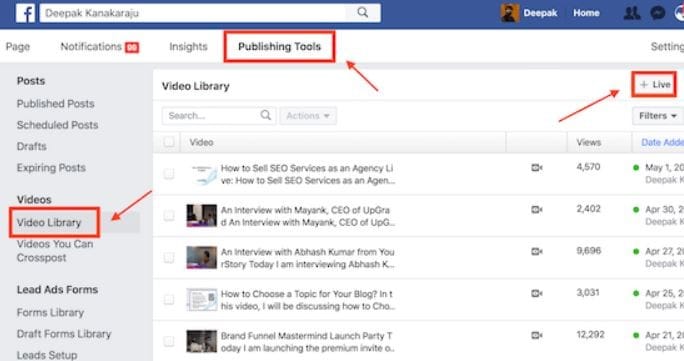
Step 1: Open your Facebook page. Tap on Publishing Tools – Video Library and then on +Live. Copy the Server URL and Stream Key from the next window that appears.
Step 2: Open the Wirecast application. Connect your DSLR camera to the capture card which is connected to your PC using an HDMI or SDI connection.
Note: You can also connect the cam directly.
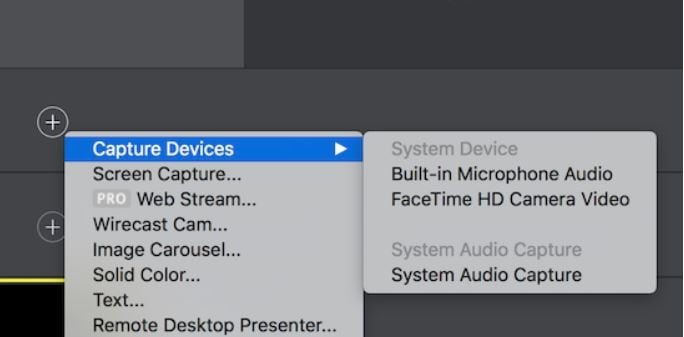
Step 3: Turn your DSLR on and click the + icon on the Wirecast layer. Tap on Capture Devices and tap on your connected camera or capture card.
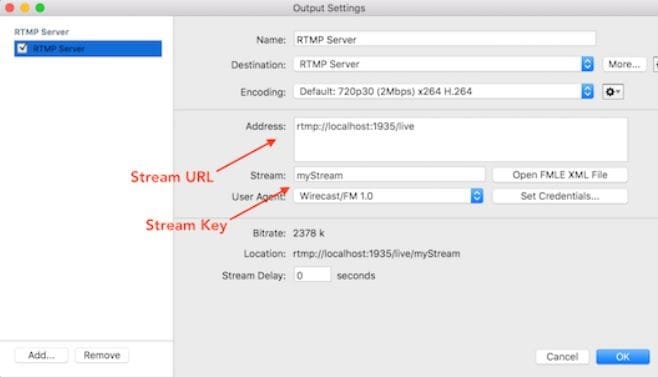
Step 4: Go to Output and tap on Output Settings. Paste the previously copied Stream URL and Stream Key to the respective columns. Once you are set to go, tap on Output – Start/Stop Broadcast and then click on Start all to go live.
Conclusion
The popularity and the likes you get for your live stream depends on the type of content and the quality of content you are streaming. Using a DSLR camera and other streaming equipments like microphones to live stream on Facebook and YouTube can enhance the overall quality of the video.
In cases where direct streaming is not possible there are different third-party applications like OBS, XSplit, and Wirecast which can help in better streaming and also offers other editing features. Hope our suggestions will help you in having an amazing streaming experience. Please give feedback about this article in the comment box below. We value your feedback and will be using it to improve the quality of our content. Thank you!
[Bonus]: If you want to record or edit your streaming videos, we recommend you to try Filmora Video Editor. Its amazing features will definitely surprise you.


