How can I add subtitles or captions to video in iMovie? When use iMovie, you can add subtitles to the video to make your movie professional-look. iMovie can add subtitles/texts/captions through rendering which largely involves conversion, it can add the subtitles directly to the video as they are or embed to later superimpose the subtitle on the movie. In this article, you will learn more about how to add subtitles to videos in iMovie 11/9/8 easily.
- Part 1. Add Subtitles to Movies Using iMovie Alternative
- Part 2. Guide for How to Add Subtitles in iMovie
Part 1. Add Subtitles to Movies Using iMovie Alternative

Filmora Video Editor for Mac is one of the effective iMovie alternative for Mac (macOS High Sierra 10.13 included) and Windows to add subtitles to videos.
It should be your choice if at all you are keen on enhancing the quality of your video in a consistent and flexible manner. It has some outstanding features that make the software a force to reckon with in the industry. There are assorted editing tools to use, it performs color correction through adjusting contrast and brightness and there are animated templates as well as faceoff which are good for making green screen without hassle.
Why Choose This iMovie Alternative to Add Subtitles
- Provides 130 types of titles and texts effects, and you can customize the subtitles;
- Supports almost all the popular video formats, audio files and images. No incompatibility issues;
- Hand-picked filters, overlays, motion graphics, titles, intro/credit. More effects are added regularly;
- Special effects, like green-screen, split-screen, face-off, etc. are available as well;
- Export video in multiple formats or directly optimize videos for YouTube, Facebook, Vimeo, etc;
How to Add Subtitles to Video in iMovie Alternative
If you have a movie that you are keen to add subtitles, worry no more because Filmora Video Editor for Mac will help you out in a convenient and effective manner. Open the software and browse to have a view of the subtitle options available.
Step 1. Import video to the program
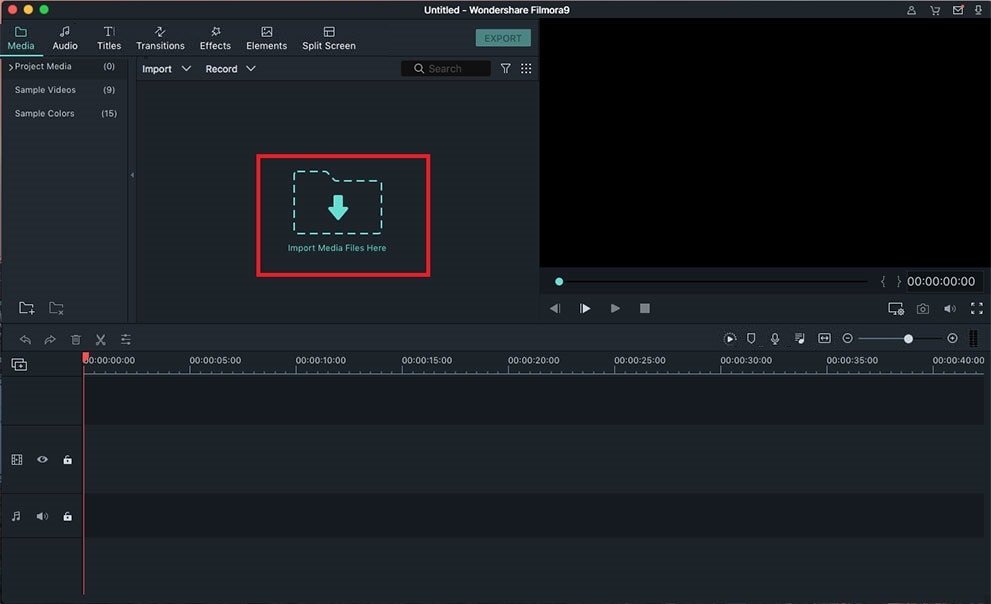
In the main interface of the program, click on the "Import Media" button and select your local video to import it to the program. And then drag the video to the timeline for editing.

Step 2. Add subtitles to video
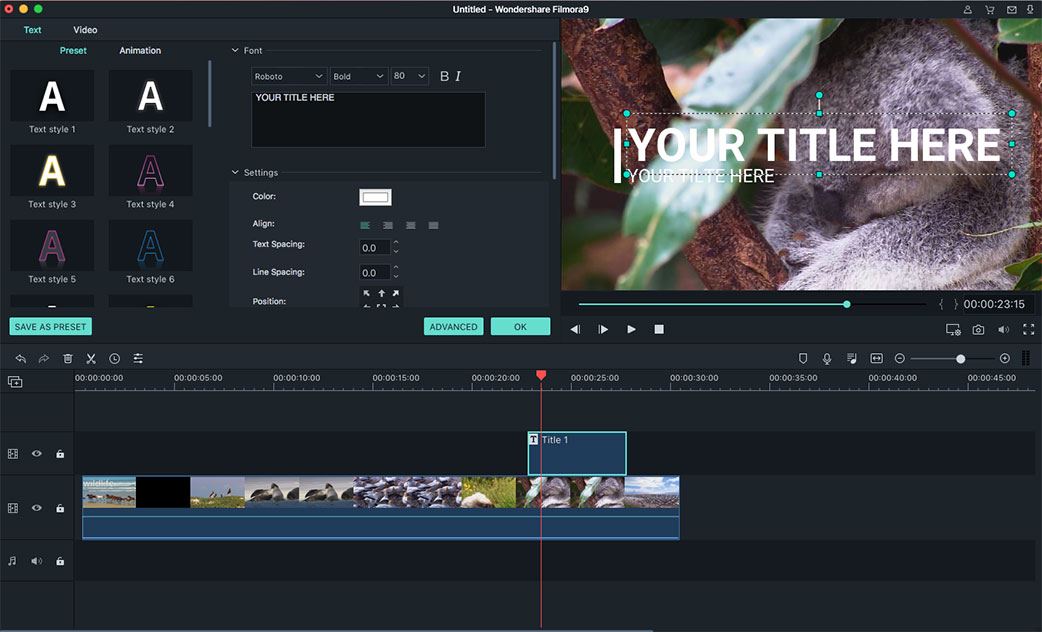
From the “T” icon on the toolbar of the program, you will see the “Subtitles” option which you will click to have the right ones imported directly. It is a pretty simple process that you will not need much effort to accomplish.

Step 3. Customize the subtitles
Double click on the subtitles you have added, you can edit the subtitles and change the font, coclor and more. After that, click to save your change.

Part 2. Easy Guide on How to Add Subtitles in iMovie

As discussed above, there are many reasons why subtitles will be necessary for movies and you can add that in iMovie. Sometimes, people experience difficulties adding subtitles in iMovie but this guideline will come to your aid very well. The whole process will officially start once the iMovie program has been launched. It is good that you preview the video you want to add subtitles in video using iMovie making sure it is complete and ready for editing. That has to be done before you officially start the editing. When you are comfortable with its status, add the movie to the iMovie timeline as this is where all the editing work takes place.
Steps to Add Subtitles/Captions in iMovie
Step 1: From the timeline, you can easily view the videos and open the one to start with if they are many. Make sure you have spotted out the specific sections of the movie that subtitles will be placed. Remember it is not possible to have subtitles placed in every part of the movie but in precise areas. That is what you will have to select. One by one, have the cursor placed in these areas and go to “edit” where there will be an option to choose “split video clip at playhead”. At this point, you will be ready to settle on the subtitles of your choice. Click on the “editing” icon and choose “titles” from where you will get a long list but select “subtitles” since that’s your key concern.
Step 2: Placing the cursor on the “subtitles” will open up two options for your consideration; subtitle and stripe subtitle. There is no major difference between the two only that the last one will have a stripe appearing just below the text. Feel free to choose any of the two and have it well customized in a way that it will appear to be the best. There are customizing options like color, font, lines and size which you will not have to ignore. Likewise, you can choose on whether your subtitle will be over black or over video which simply indicates how the subtitles will appear on the screen. Proceed to add the selected subtitles to your video in iMovie.
Step 3: Your first click should be on the initial part you selected to have subtitles slotted in. A window will open up to allow you type the exact words to include after which you will click “add” and the subtitle will be successfully added. Repeat that procedure in all the sections you earlier highlighted as suitable for adding subtitles. If they are many and the movie is lengthy, it will definitely take a lot of time to complete but exercise patience.
Step 4: You don’t have to repeat the whole process once a minor mess has occurred while adding subtitles. You will require clicking on the clip at the exact point of inserting the subtitle and the editing option will be visible on the left side. To save changes, click on the “update” button.


