


Apple pre-introduced QuickTime Player, an application that allows you to record, alter, play, and offer sound and video documents onto each Mac. QuickTime Player may be your first choice for screen recording software on Mac, but it can only record outer sound, such as the sound that comes in through the receiver.
As the Mac doesn't offer the answer to catch a screen with interior sound, you have to go to an outsider application. If you have the most recent Mac, this article provides an instructional guide to realize how to do a screen and audio recording on Mac with QuickTime screen recorder handily.
- Part 1:How to Record Screen and Audio on Mac with QuickTime >
- Part 2: How to Use QuickTime to Record Screen and Audio on iPad and iPhone >
- Part 3: Best Alternative Recorder to QuickTime Player for Mac --- Filmora Video Editor >
Part 1:How to Record Screen and Audio on Mac with QuickTime
Macintosh OSX has QuickTime Player implicit. QuickTime permits you to do a screen recording effortlessly. Nonetheless, while doing such, you get the screen but with no sound. This article is committed to recording on Mac with sound simultaneously and recording inward sound on Mac.
Steps to record screen on Mac with audio
Step 1: Download and Install Soundflower
Soundflower is a framework expansion that lets you channel sound starting with one application then onto the next. The initial step includes figuring out how to snatch sound playing in one application, a Web program, for instance, and course it to an application that can catch that sound.
Step 2: Reboot your MacBook
Whenever you have downloaded and introduced your new programming program, then you should restart your framework. It will assist with reviving all controls so you can never discover any difficulty during the account meeting.
Step 3: Configure and Setup Soundflower
After you've introduced Soundflower, dispatch the Sound framework inclination, and you'll see proof of Soundflower in the Output and Input tabs. Select the Output tab and pick Soundflower. It will assist you with killing the sound sign to speakers, and it will be straightforwardly moved to the Soundflower stage.

Step 4: Open up QuickTime Player
You have several applications on your Mac that can catch Soundflower sound, QuickTime Player. To arrange QuickTime Player:
1. Pick File > New Audio Recording.
2. In the Audio Recording window that shows up, snap on the descending directing triangle toward the Record button's privilege.
3. From the menu that shows up, pick Soundflower.

Step 5: Setup MacBook Sound
When you pick Soundflower as your Mac's sound yield, you can presently don't hear it through connected speakers or earphones. With the goal for you to screen what's going on, dispatch the Soundflowerbed application (found in / Applications / Soundflower). Snap the Soundflowerbed menu bar thing that shows up and pick your speakers or earphones from the menu.
Step 6: Start and End your Recording
Presently you can begin the accounting cycle by just hitting the little bolt accessible on the screen. The QuickTime programming apparatus's video nature is appraised to be exceptionally high, and Soundflower can aid improved sound quality so clients can produce proficient instructional exercises for games just as for some applications.
When your account cycle is finished, the time has come to disengage sound bloom from sound info to get back your sound on speakers. For this, you need to visit framework inclinations and afterward select sound settings, go to yield, and choose Internal Speakers as the objective.
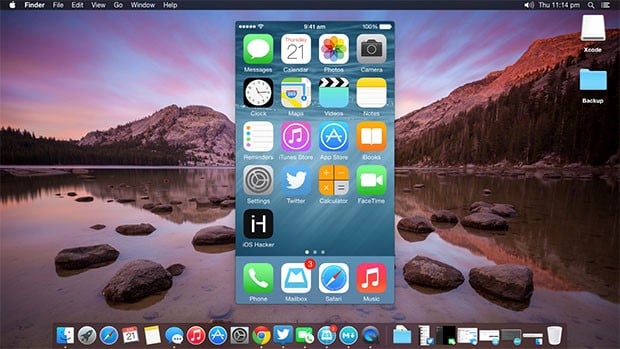
Part2:How to Use QuickTime to Record Screen and Audio on iPad & iPhone
You can record the screen of your iPhone, iPad, and iPod contact in a straightforward way with QuickTime. This component is planned particularly for the professionals as a video demo of their applications can be more impressive than the static screen recording with a voice Mac.
QuickTime Player
QuickTime Player turns into the default choice for plenty of clients because it is packaged into the macOS as mac screen recorder studio. It has an intuitive, simple to-utilize interface that makes it simple to explore and discover the media you're searching for. You can likewise record and alter video with QuickTime, yet it requires a QuickTime Pro membership, an expense of $29.99.
Pros:- • Naturally included with macOS.
- • Works with iTunes documents
- • Simple to utilize interface .
- • Viable with the iPad just as iPhone so you can start the chronicle cycle
- • Not viable with Windows.
- • Doesn't work with normal caption records .
- • Less expansiveness of similarity than contenders.
- • Clients can't hear sound from speakers.
Follow the basic strides underneath to record the screen of your iOS gadget.
Step 1: Interface your iPhone, iPad, or iPod contact to your Mac utilizing a Lightning Cable.
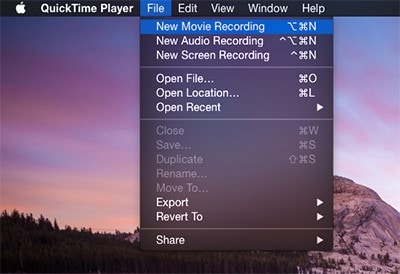
Step 2: Open the QuickTime application
Step 3: Go to File and choose New Movie Recording.
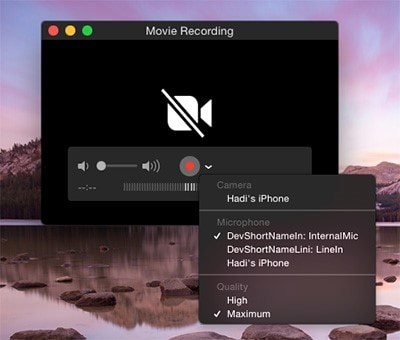
Step 4: An account window will show up. You will see a little bolt for the dropdown menu before the record button. Snap that bolt and select your iPhone.
Step 5: Select the Mic of your iPhone if you need to record music, application / game sounds.

Step 6: Snap the Record button. Presently play out the errands on your iOS gadget that you need to record.
Step 7: When done, tap the stop catch and output the video.
Part 3: Best Alternative Recorder to QuickTime Player for Mac --- Filmora Video Editor
Although you can record screen and sound on Mac with Apple's default toolkit QuickTime after considering the cons and the drawbacks of that software, it would be mandatory for you to consider an alternative that can compete and turn out to be the best free screen recording software for Mac. Therefore, while considering the fact with QuickTime in competition, here's the kicker for you to try out Filmora Video Editor & Filmora Video Editor for Mac with the fast-paced and super-handy interface so you can quickly get used to it right from your MacBook.
Filmora Video Editor – Best Recorder For Mac
- Screen recording task is made easy and handy with Filmora X.
- You can edit your recordings right after you’re done with the recordings.
- It has a straight-forward interface to tackle the pro-level altering to your recordings.
- You can also record and edit the audio of your recordings with Filmora X’s built-in audio editor module.
- It has a built-in variety of templates and effects so that you can include them within your recordings and videos.
- You can also polish your previously recorded videos with this software’s editing toolkit.
Steps to Screens recording in Filmora X
Follow the step-by-step guide below to perform screen recordings on your MacBook with Filmora X:
Step 1: Create a New Project to Record Mac Screen
As soon as you launch this masterpiece from your MacBook, you shall be witnessing the below interface from which you need to opt for New Project so you can go for recording PC screen effectively.

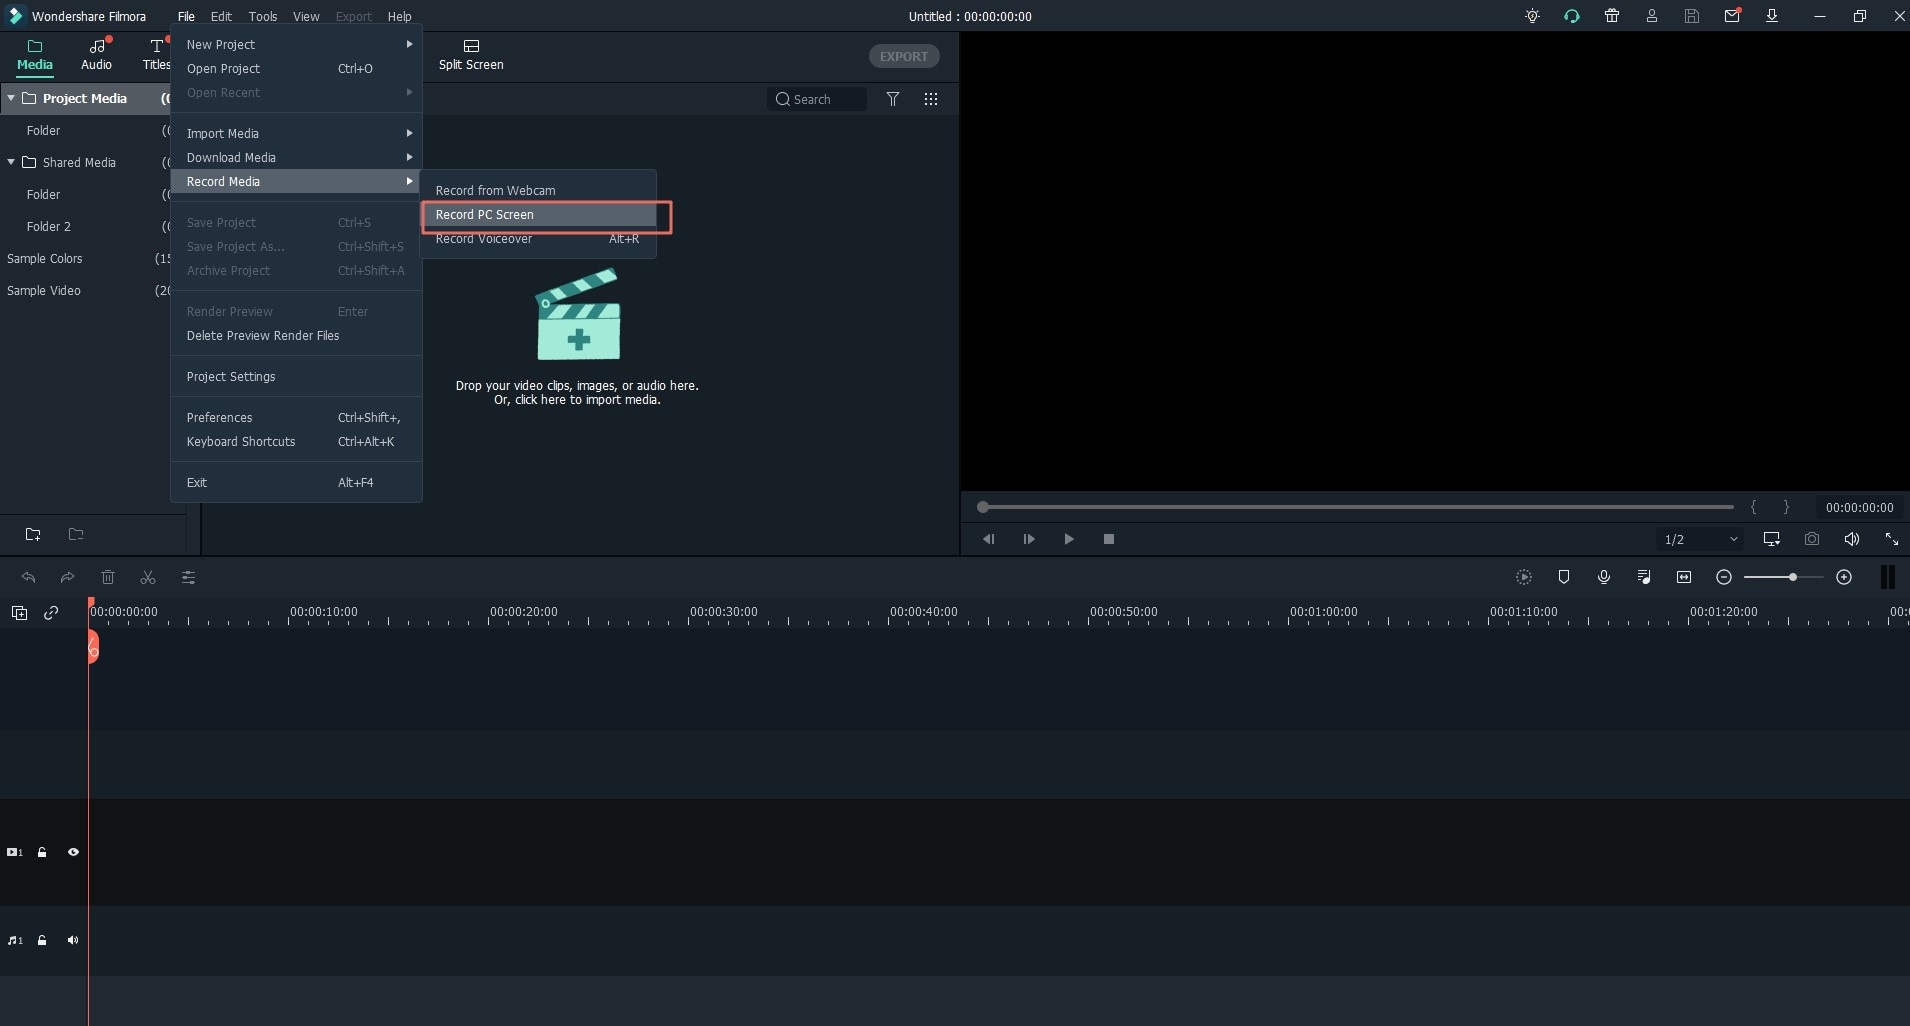
Step 2: Open Recorder for Mac Screen
In the starting interface, go straight towards the Record dropdown menu and navigate Record PC Screen, as shown below:
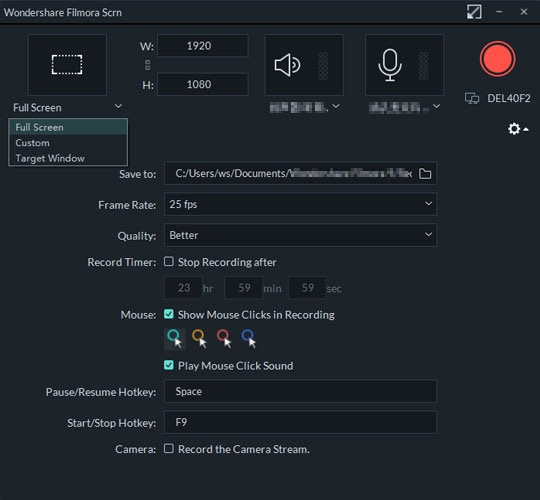
Step 3: Customize Recording Screen
Meanwhile, within the recording window of Filmora Video Editor, you have got plenty of customization settings to opt for before starting recording your MacBook screen as follow:
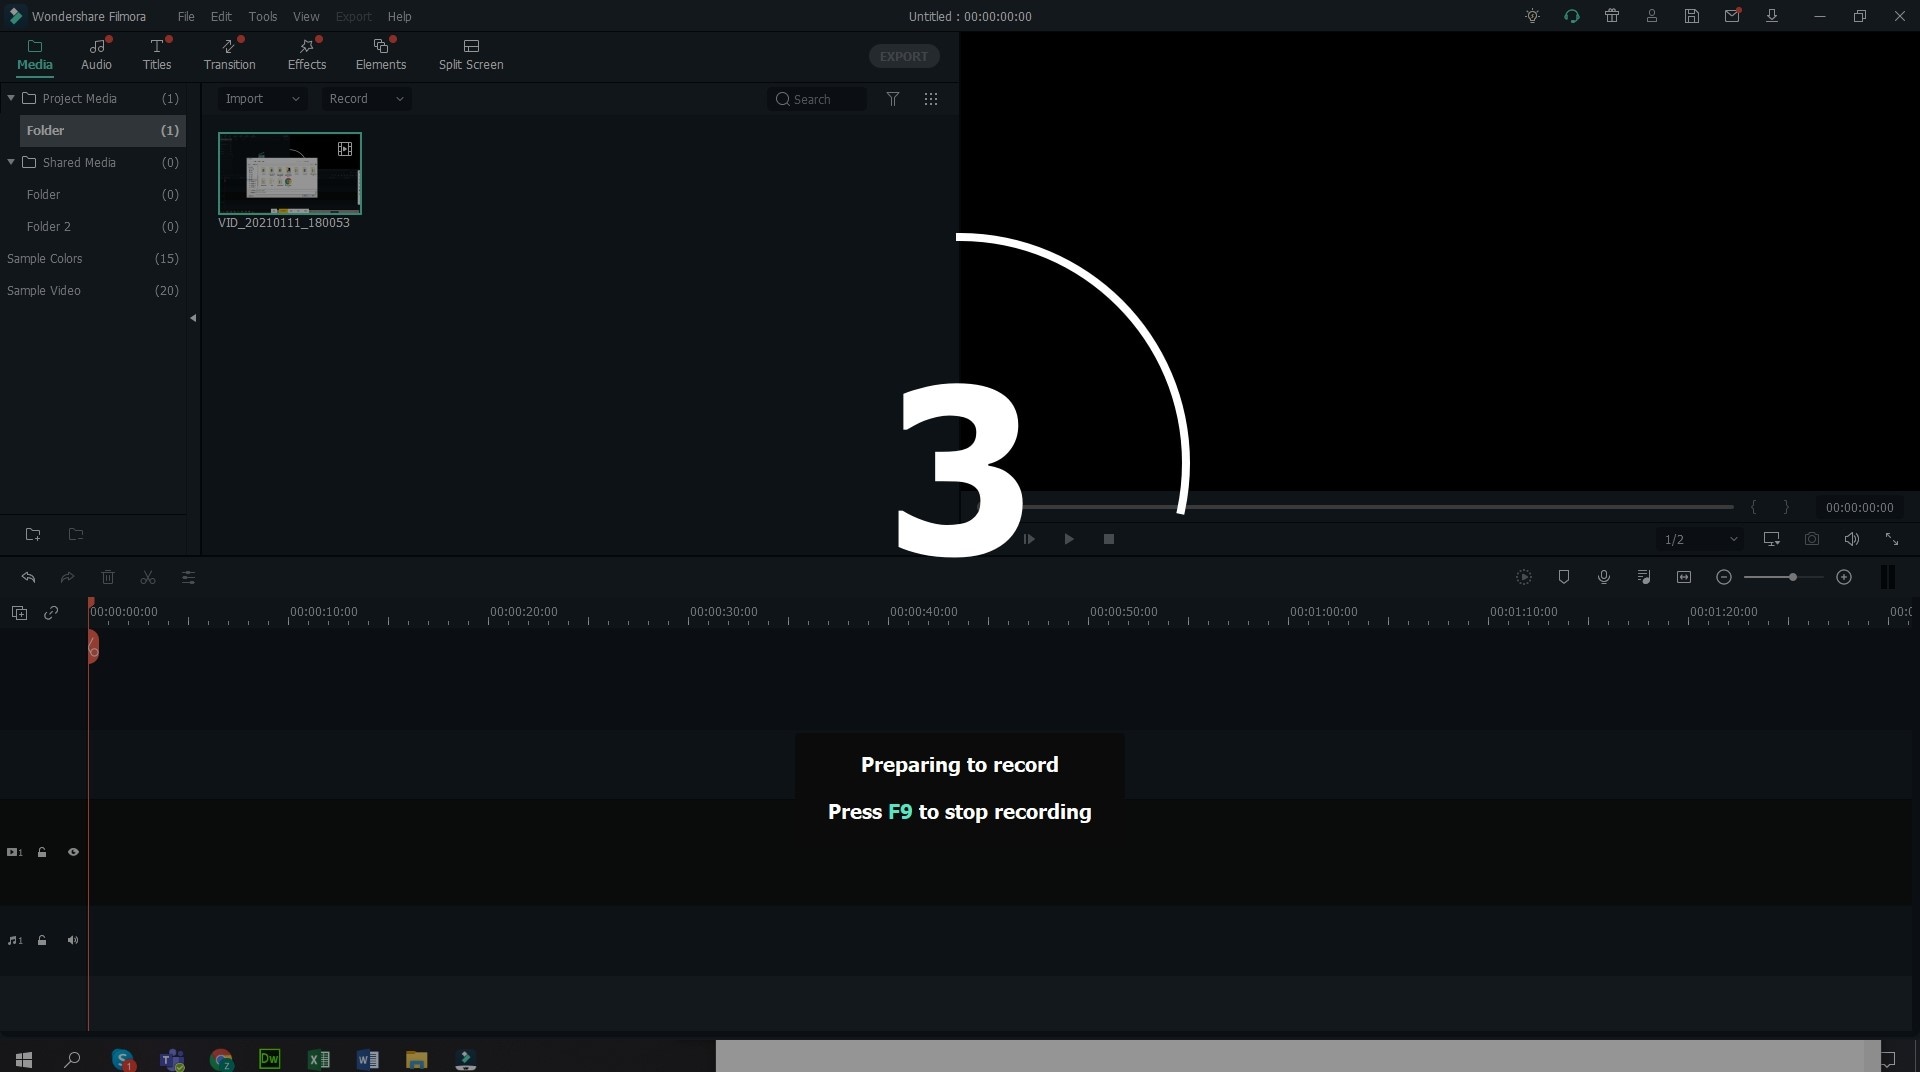
Step 4: Start Recording
As soon as you’re done with the customization of your recording screen properties, now is the time to hit the Red Circled button, which shall start your MacBook screen recording within 3 seconds of hitting the recording button as follow:
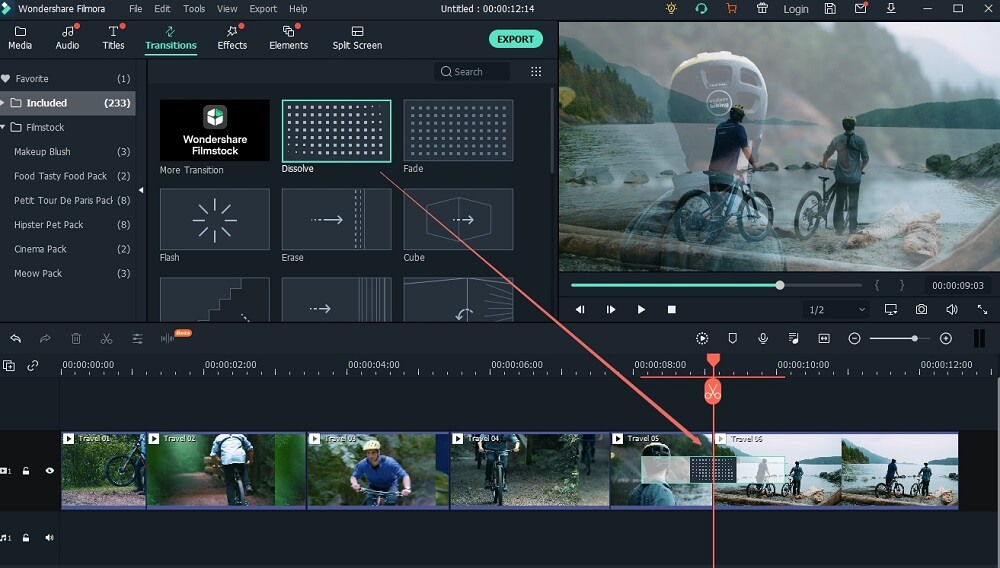
Step 5: Edit your Recording
As the recording has been done and you want to eliminate the anomalies in your recording screen or sound, then Filmora Video Editor is here for you to perform some pro-level altering to your recording within the software. You can introduce Effects, Transitions, Stickers, Elements, Music, and much more within this software.
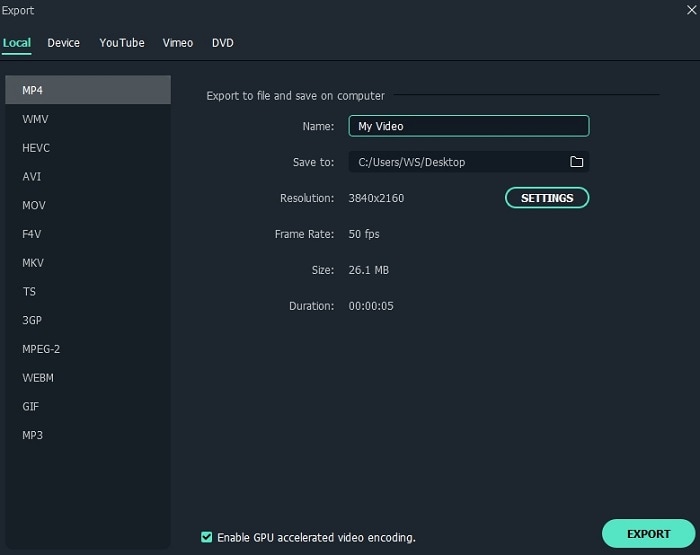
Step 6: Export your Masterpiece
At last, when you’re satisfied with the recording and it's up to the mark, then hit the Export button of Filmora Video Editor, which shall take you to the Export window of your masterpiece and from where you can customize your output file in your desired settings.
Summary
QuickTime Player, a cross-stage media instrument intended for macOS, allows you to record the screen with Mac's implicit amplifiers simultaneously. Utilizing this product in addition to QuickTime Player, you can record the screen with sound on Mac. On the other hand, a wise recommendation on behalf of how to record screen recording with sound on the Mac is Filmora Video Editor for Mac (or Filmora Video Editor), which has a built-in screen recorder to perform the task intuitively.
Although it can be termed as an iPhone screen recorder for Mac, the mac screen record shortcut is nevertheless a QuickTime player. Still, due to its limitations, it is a wise recommendation to opt for the alternative as it has everything summed up with its built-in toolkit.


